 CONTACT
Handmade CLE Tile Bathroom Remodel
in Pasadena, California
Handmade Tile Full Remodel
- LOCATION
- Pasadena, CA
- DURATION
- 10 working days, demo to done
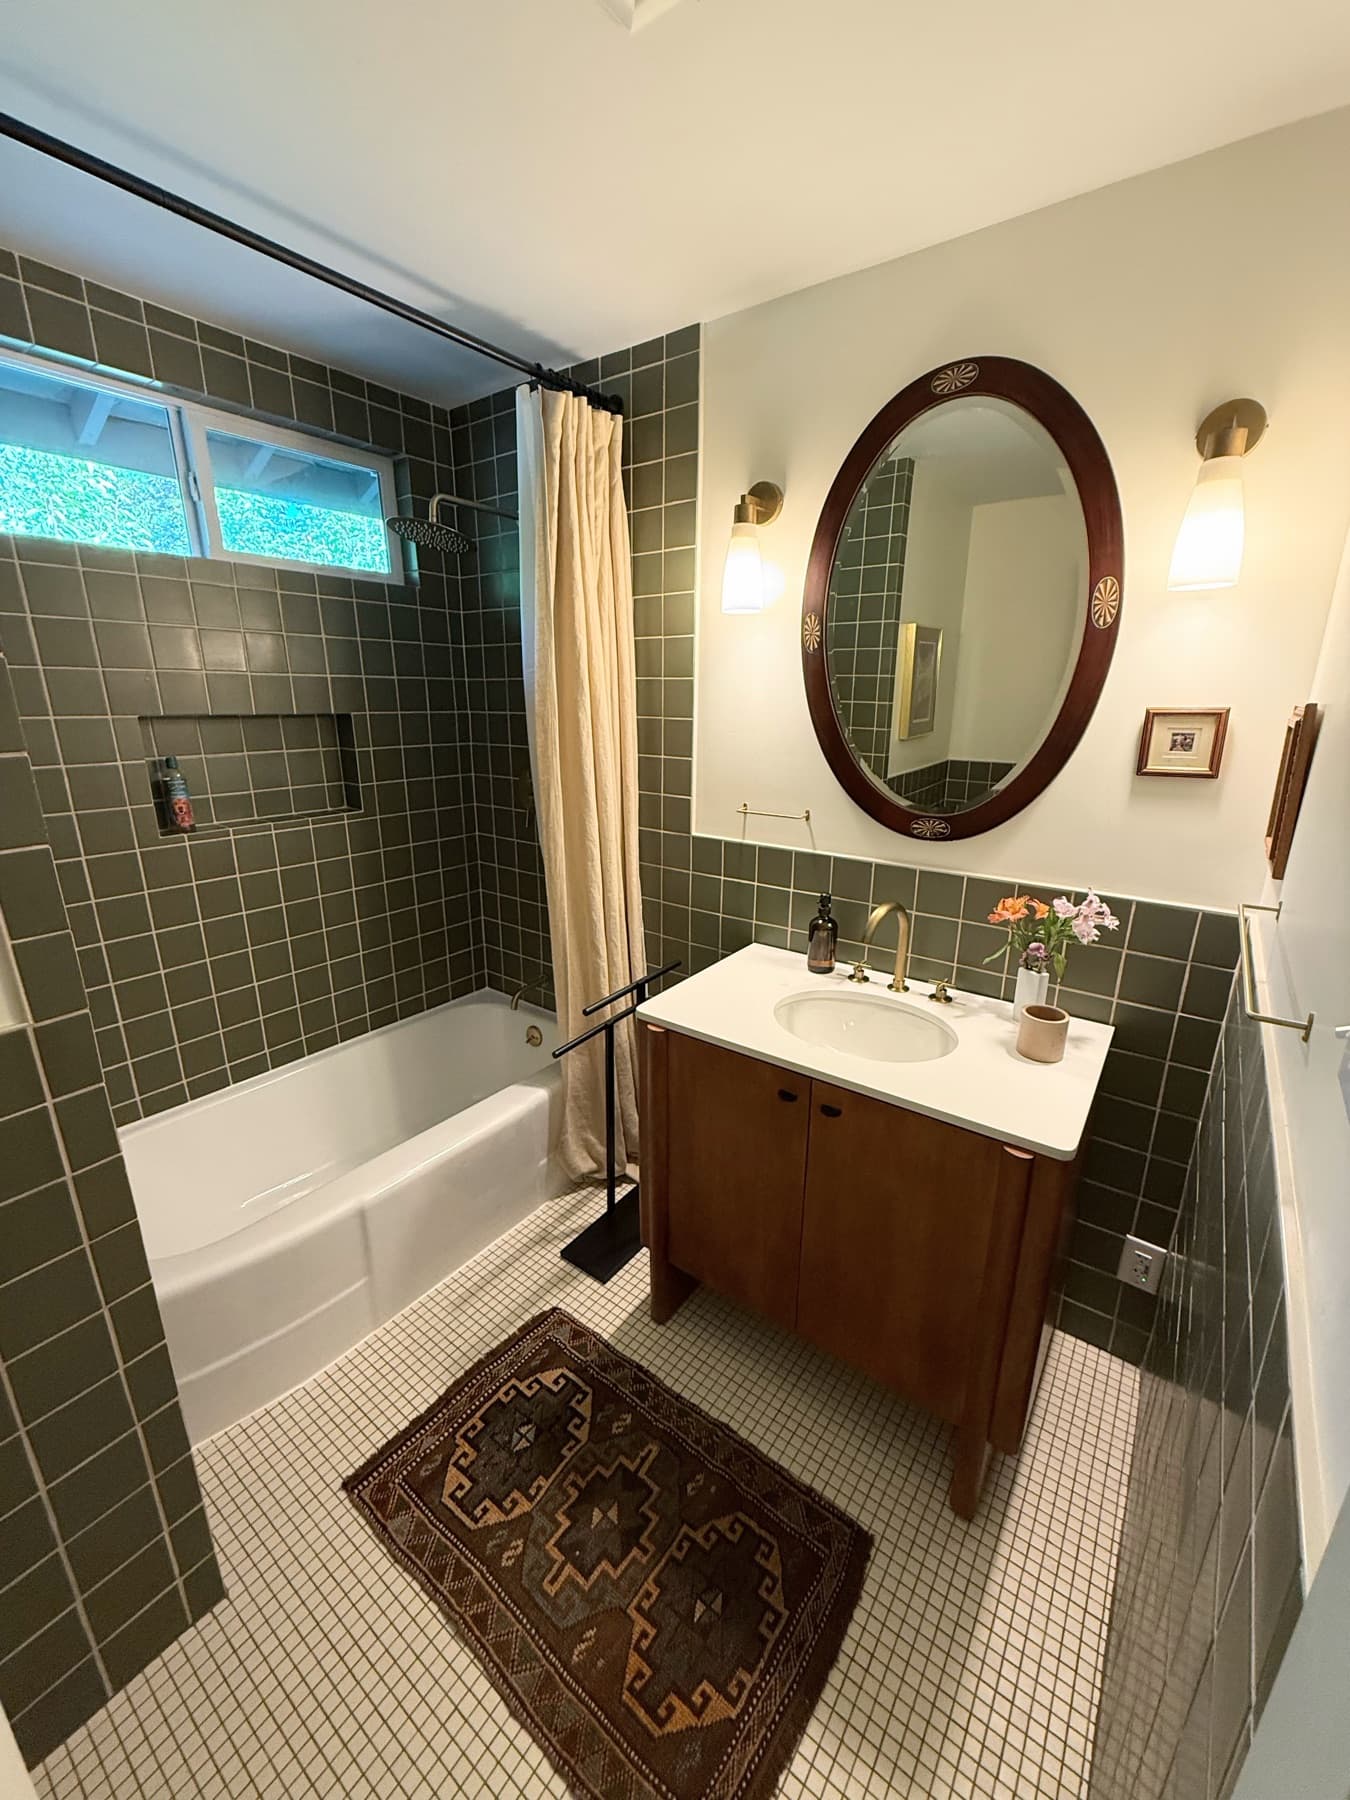
The transformation.
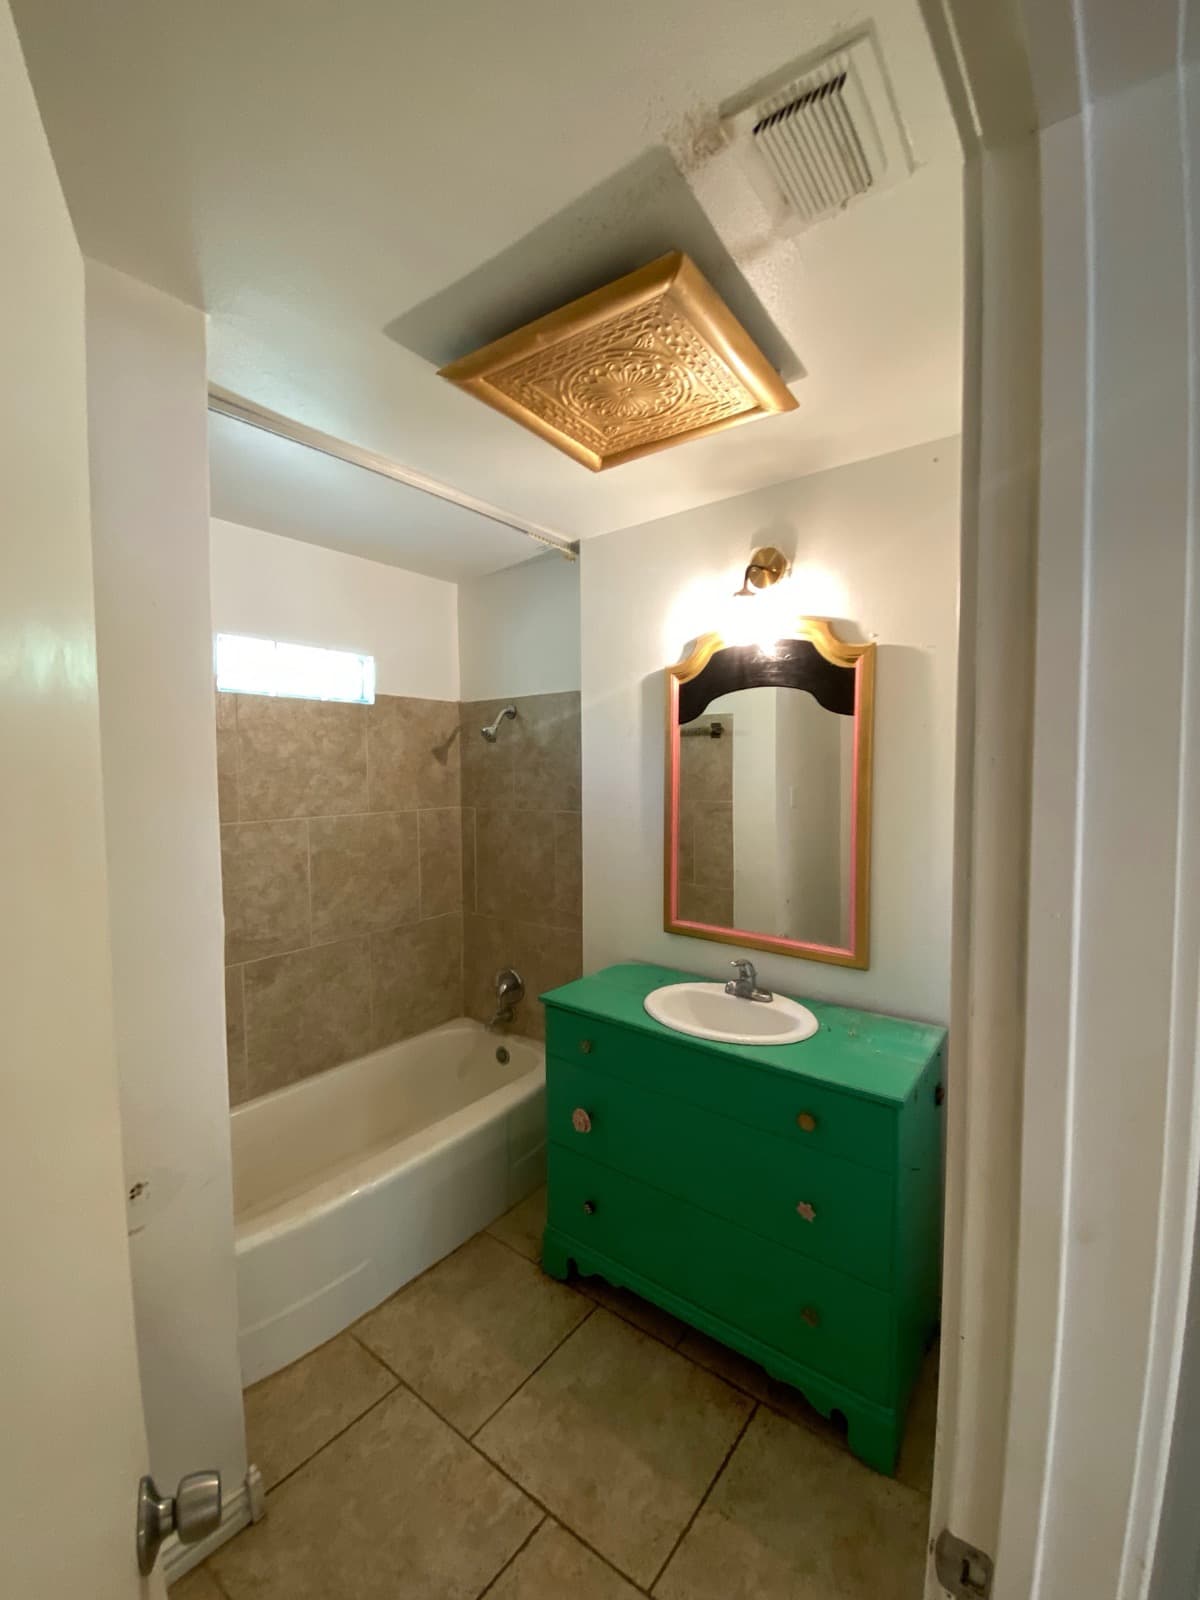
Tom and Paige's craftsman came with a bathroom the previous tenant of the house had left dated and decrepit: genuinely in shambles. The two of them are young, have great taste, and wanted a bathroom that reflected their personality. They had already hand-selected handmade olive-green 4×4 tiles from CLE and a 1×1 mosaic to pair with them on the floor, plus a vintage vanity and mirror they sourced themselves. They kept the tub, since their other bathroom has a walk-in shower, and asked us to move the existing shower fixtures up. They'd been set too low for anyone of normal height.
This project actually started as a rescue. A contractor who'd done other work around the house began the bathroom by laying the floor tile, and did it badly enough that the clients had him stop and hired us to restart the entire project. The mosaics had gone down totally uneven, with grout joints that didn't line up. And 1×1 mosaics are notorious for showing every imperfection.
Ripping up that floor exposed the real problem: the plywood subfloor was badly out of whack, and beneath it the floor joists were over an inch out of level from one side of the bathroom to the other, across just seven feet. We made framing adjustments across all of the joists, sistering on new lumber and adding furring strips where needed. The wall insulation turned out to be fully destroyed by black mold, and some of the plumbing was questionable, so those went too.
Then came the accident that did the house a favor. During floor demo we cut through a power cord plugged into a wall outlet, and the entire house lost power. That should be impossible: a shorted cord is supposed to trip only the circuit it's plugged into. That red flag led to the electrical box being replaced, which in turn revealed that the breaker box for the entire house was wired incorrectly (absolutely not up to code) and it was replaced entirely. Those problems would have surfaced eventually; better on our demo day than some random evening years later.
With the joists corrected we rebuilt the floor properly: new 3/4-inch plywood subfloor, 1/2-inch HardieBacker over it, then the 1×1 mosaic. We hung new drywall on the parts of the bathroom that weren't getting tile, and waterproofed the tub surround with GoBoard, a pre-waterproofed foam board that's a great lower-cost alternative to a full Schluter system when the job needs waterproof walls rather than a comprehensive wet-room build.
In the shower we built a small soap niche, centered under a new window that replaced the tiny old one, and set the fixtures at a proper height. Every exposed tile edge (around the niche, the window, and the outside corner of the shower wall) was mitered at 45° and polished, because the manufacturer doesn't make an edge trim that matches this field tile and we weren't going to introduce a new material. Where the tile meets drywall, a subtle Schluter strip painted matte caps things off and blends into the green.
The edging. Trim is the material consideration almost nobody makes when they fall in love with a handmade tile. It's an afterthought until the consultation, when it suddenly threatens to change the look of the whole bathroom. There are really three options: hunt for a complementary trim piece, which is very difficult with a unique handmade tile; introduce a Schluter profile, which brings a new material and color the client never envisioned; or miter every corner. Mitering is by far the most tedious (with 4×4s that's a lot of pieces, each cut at a 45° angle and polished 100% chip-free), and the extra time comes with extra cost, so it's always a frank conversation. Tom and Paige chose the miters and were super happy they did. Once the vintage mirror and accents went in, we all agreed it came together better than any of us anticipated: a bathroom that's uniquely theirs.
Questions about
this project.
Can you take over a tile job another contractor started?
Yes, this was one. Taking over usually means demoing back to the substrate rather than building on top of someone else's work, because the visible tile is rarely the real problem. Here the floor that looked bad was sitting on joists more than an inch out of level.Why did a tile project turn into subfloor and joist work?
Tile is only as flat as the structure under it, and small mosaics show everything. With the joists over an inch out of level across seven feet, no amount of careful setting could have saved the floor, so we sistered the joists, added furring, and rebuilt with new plywood and backer board.What's the best way to finish the edges of handmade tile?
If the maker offers no matching trim, the cleanest option is to miter every exposed edge at 45° and polish it chip-free. It's the most labor-intensive route, but it means the only material you see is the tile the client actually chose.
More on this kind of work: bathroom remodeling.
Similar projects: Herringbone Bath, Kit-Kat Kitchen.
KIT-KAT KITCHEN
VIEWLet’s build
something timeless.
Tell us about the project. We respond to most inquiries within a day, and Corey reads every message himself.